This page has been visited 39272 times.
Table of Content (hide)
The purpose of this tutorial is to show how to easily add WebRTC functionalities to any existing OpenSIPS deployment.
The solution below requires no changes at all on the OpenSIPS side ( because it relies on a WebSocket to SIP gateway ), thus it can be easily integrated with 0 side-effects to your existing deployment.
Secondly, the solution uses entirely open source components ( both for the server and the client side ) - which gives you great flexibility on the server side, as well as on the client side - since you can easily integrate the client into your existing client portals.
OpenSIPS will have to be configured with NAT support. If you do not have NAT support in your OpenSIPS script, or if you want to generate a brand new script, you should use the menuconfig tool and generate a new Residential type script, with NAT support enabled. For more information on generating scripts see this manual page
Here you will find attached a very basic OpenSIPS Residential script with NAT support that should work very well for our scenario.
OverSIP has two basic configuration files that will need to changed in order to achieve our desired functionality :
oversip.conf ( by default located in /etc/oversip/oversip.conf ) contains the Main Configuration part of the server ( no routing logic here - just configuration parameters ).
The parameters that are of interest for our configuration would be :
server.rb ( by default located in /etc/oversip/server.rb ) contains the actual routing logic for the OverSIP server - written in Ruby. The default server.rb script is suitable for the purpose of WS to SIP gateway, so you shouldn't do any changes to it, with one single exception :
Here you will find attached an oversip.conf file that works well with our scenario. The config file assumes that OverSIP will listen on 192.168.2.13
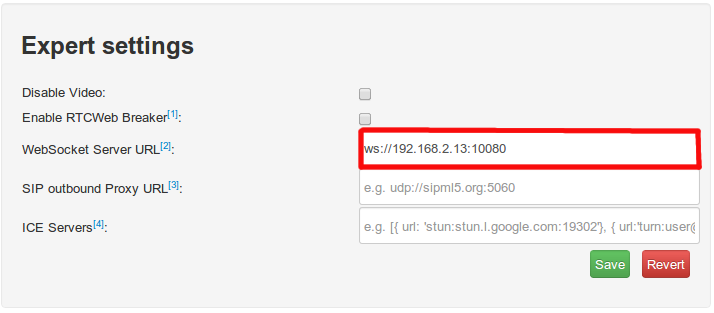
Deploy the sipML5 client on your web server, and access it in your browser. Go to expert mode and edit the WebSocket Server URL to match the OverSIP IP address and port that you entered in the websocket section of the oversip.conf file. Hit save and then return to the first page of the sipML5 client.
Then simply insert your OpenSIPS username credentials and hit login. You should then be able to call other users registered on a webRTC capable SIP client.
Assuming that we have an account on our OpenSIPS box with the opensips-domain.com domain, and that our OverSIP is listening on IP 192.168.2.13 port 10080 for WebSocket traffic, here are two screenshots that show the proper configuration of sipML5 for the SIP user configuration and for the WebSocket server configuration ( accessible from the expert mode options of sipML5 )
Because sipML5 is fully open-source, the configuration of the WebSocket Server URL can be hard-coded into the client, and the actual SIP client can be easily embedded into an existing web interface.